How to Recover Data from Unrecognized Western Digital Hard Drive in Windows 10?
“Hi everyone, recently I bought a Western Digital hard drive for my Windows 10 desktop. I have saved various types of data files in this drive such as memorable pictures, videos, project reports, documents, personal files and many others. All the files saved on WD drive are important for me. Today’s morning, when I powered on my Windows 10 computer, then it was not booting up. I tried many times but did not successfully. Due to this my all important files saved on it become inaccessible. Is there any way to recover files from WD internal hard drive not recognized Windows 10 system? Please suggest me the appropriate solution to get back files from not recognized Windows 10 Western Digital internal hard drive!”
Have you ever come across above described situation? Is this problem belonged to you? If yes, then there is no need to worry about it because all the files saved on WD internal hard drive can be easily restored with the help of a highly recommended recovery program such as Recover WD and overcome from WD internal hard drive not recognized Windows 10 issue just by following few simple mouse clicks. This WD hard drive not recognized Windows 10 computer issue can be a result of an either human mistake or other technical fault. Let us see few most common causes of WD internal hard drive not recognized:
- Wrong way of reinstalling operating system on computer drive can damage the boot sector area of Windows 10 WD internal hard drives and result in not recognized.
- Physical scratches (Bad Sectors) on WD internal drive plates can damage the drive can lead to inaccessibility.
- Malicious programs such as virus, Trojans, spyware, malware infection on Windows 10 WD internal drives can also result in not recognized.
In all these above mentioned situations you might lose your important files from Windows 10 system internal WD hard drive, but you can easily overcome from file loss issue from WD internal hard drive not recognized Windows 10 system by utilizing Recover WD application easily. You can also take the help of this easy to use software to recover files from WD My Passport Slim 2TB external drive without facing any other issues.
Salient Features of Recover WD Application:
- It supports to recover files from not recognized Windows 10 internal WD hard drives as well as also capable to recover files from various other external data storage devices such as external HDD, pen drive, flash drive, SSD, memory sticks and many more.
- You can retrieve files from various hard drive interfaces such as SATA, IDE, SCSI and others just by using simple mouse clicks.
- Recover WD tool has power to recover files from WD internal hard drive based on their file name, type, extension, size as well as by using other attributes easily.
- With the help of this user friendly app, you can recover data from a WD external hard drive that is not deducted on all versions of Microsoft Windows and Apple Mac OS based laptops and desktops easily.
Steps to Recover Data from WD Internal Hard Drive Not Recognized Windows 10:
Step 1: To restore deleted files from WD Passport first you need to download and install Recover WD software on your system and launch the tool. Select "Recover Partitions" option from the Home Screen. Then, among the list of available drives (Physical & logical), choose the drive representing your WD hard disk and hit Scan button to initiate scanning
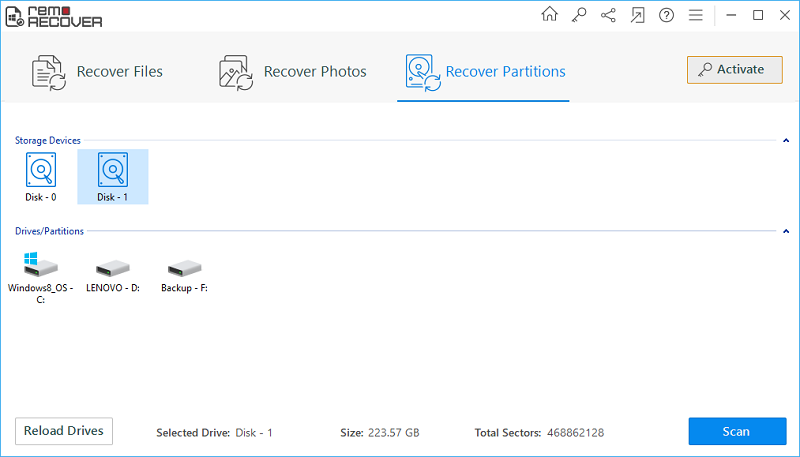
Fig 1: Home Screen
Step 2: Upon the completion of scanning the WD hard disk, a list of found partitions are displayed on the screen. Now, choose the logical partition of WD hard drive from where files has to be recovered and click Scan button to begin recovery.
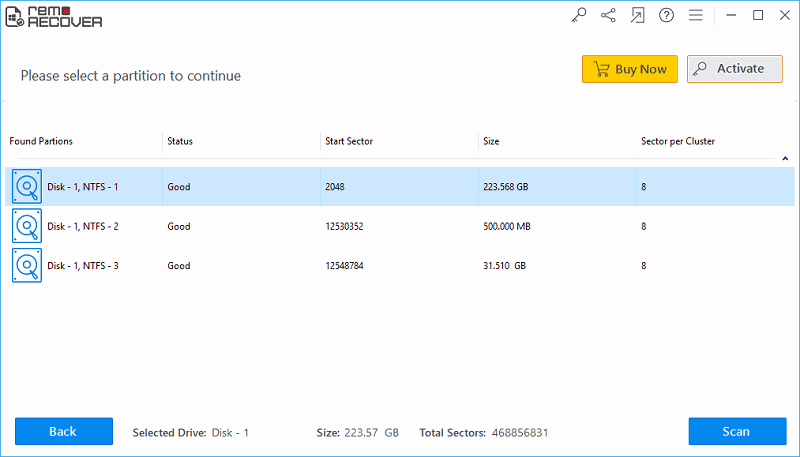
Fig 2: Choose WD Hard Drive Partition
Step 3: Upon the completion of scanning & recovery process, a list of recovered files are displayed. You can view the recovered files in File Type View, and Data View
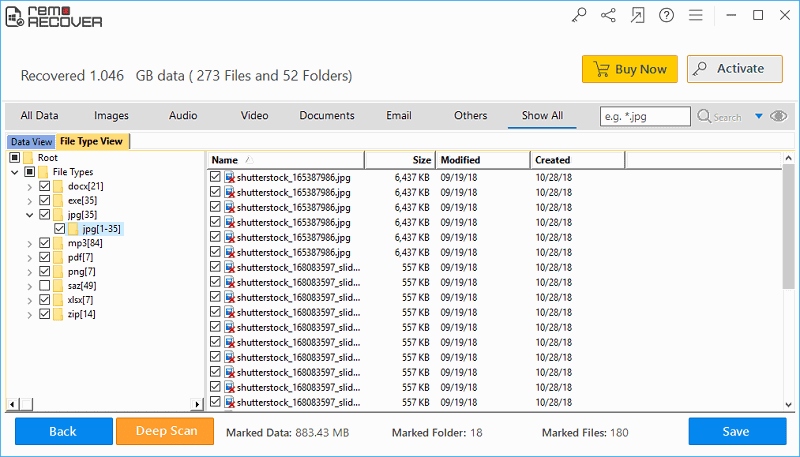
Fig 3: Select Drive
Step 4: Finally, preview the recovered files & save them at the desired location of your choice
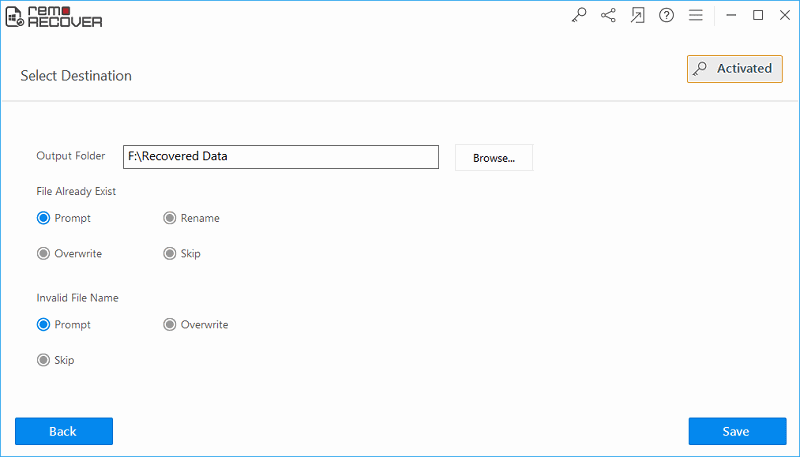
Fig 4: Preview & Save Recovered Files